

Fruiting Instructions
North Fork Mushrooms
How to fruit your mushroom fruiting block kit
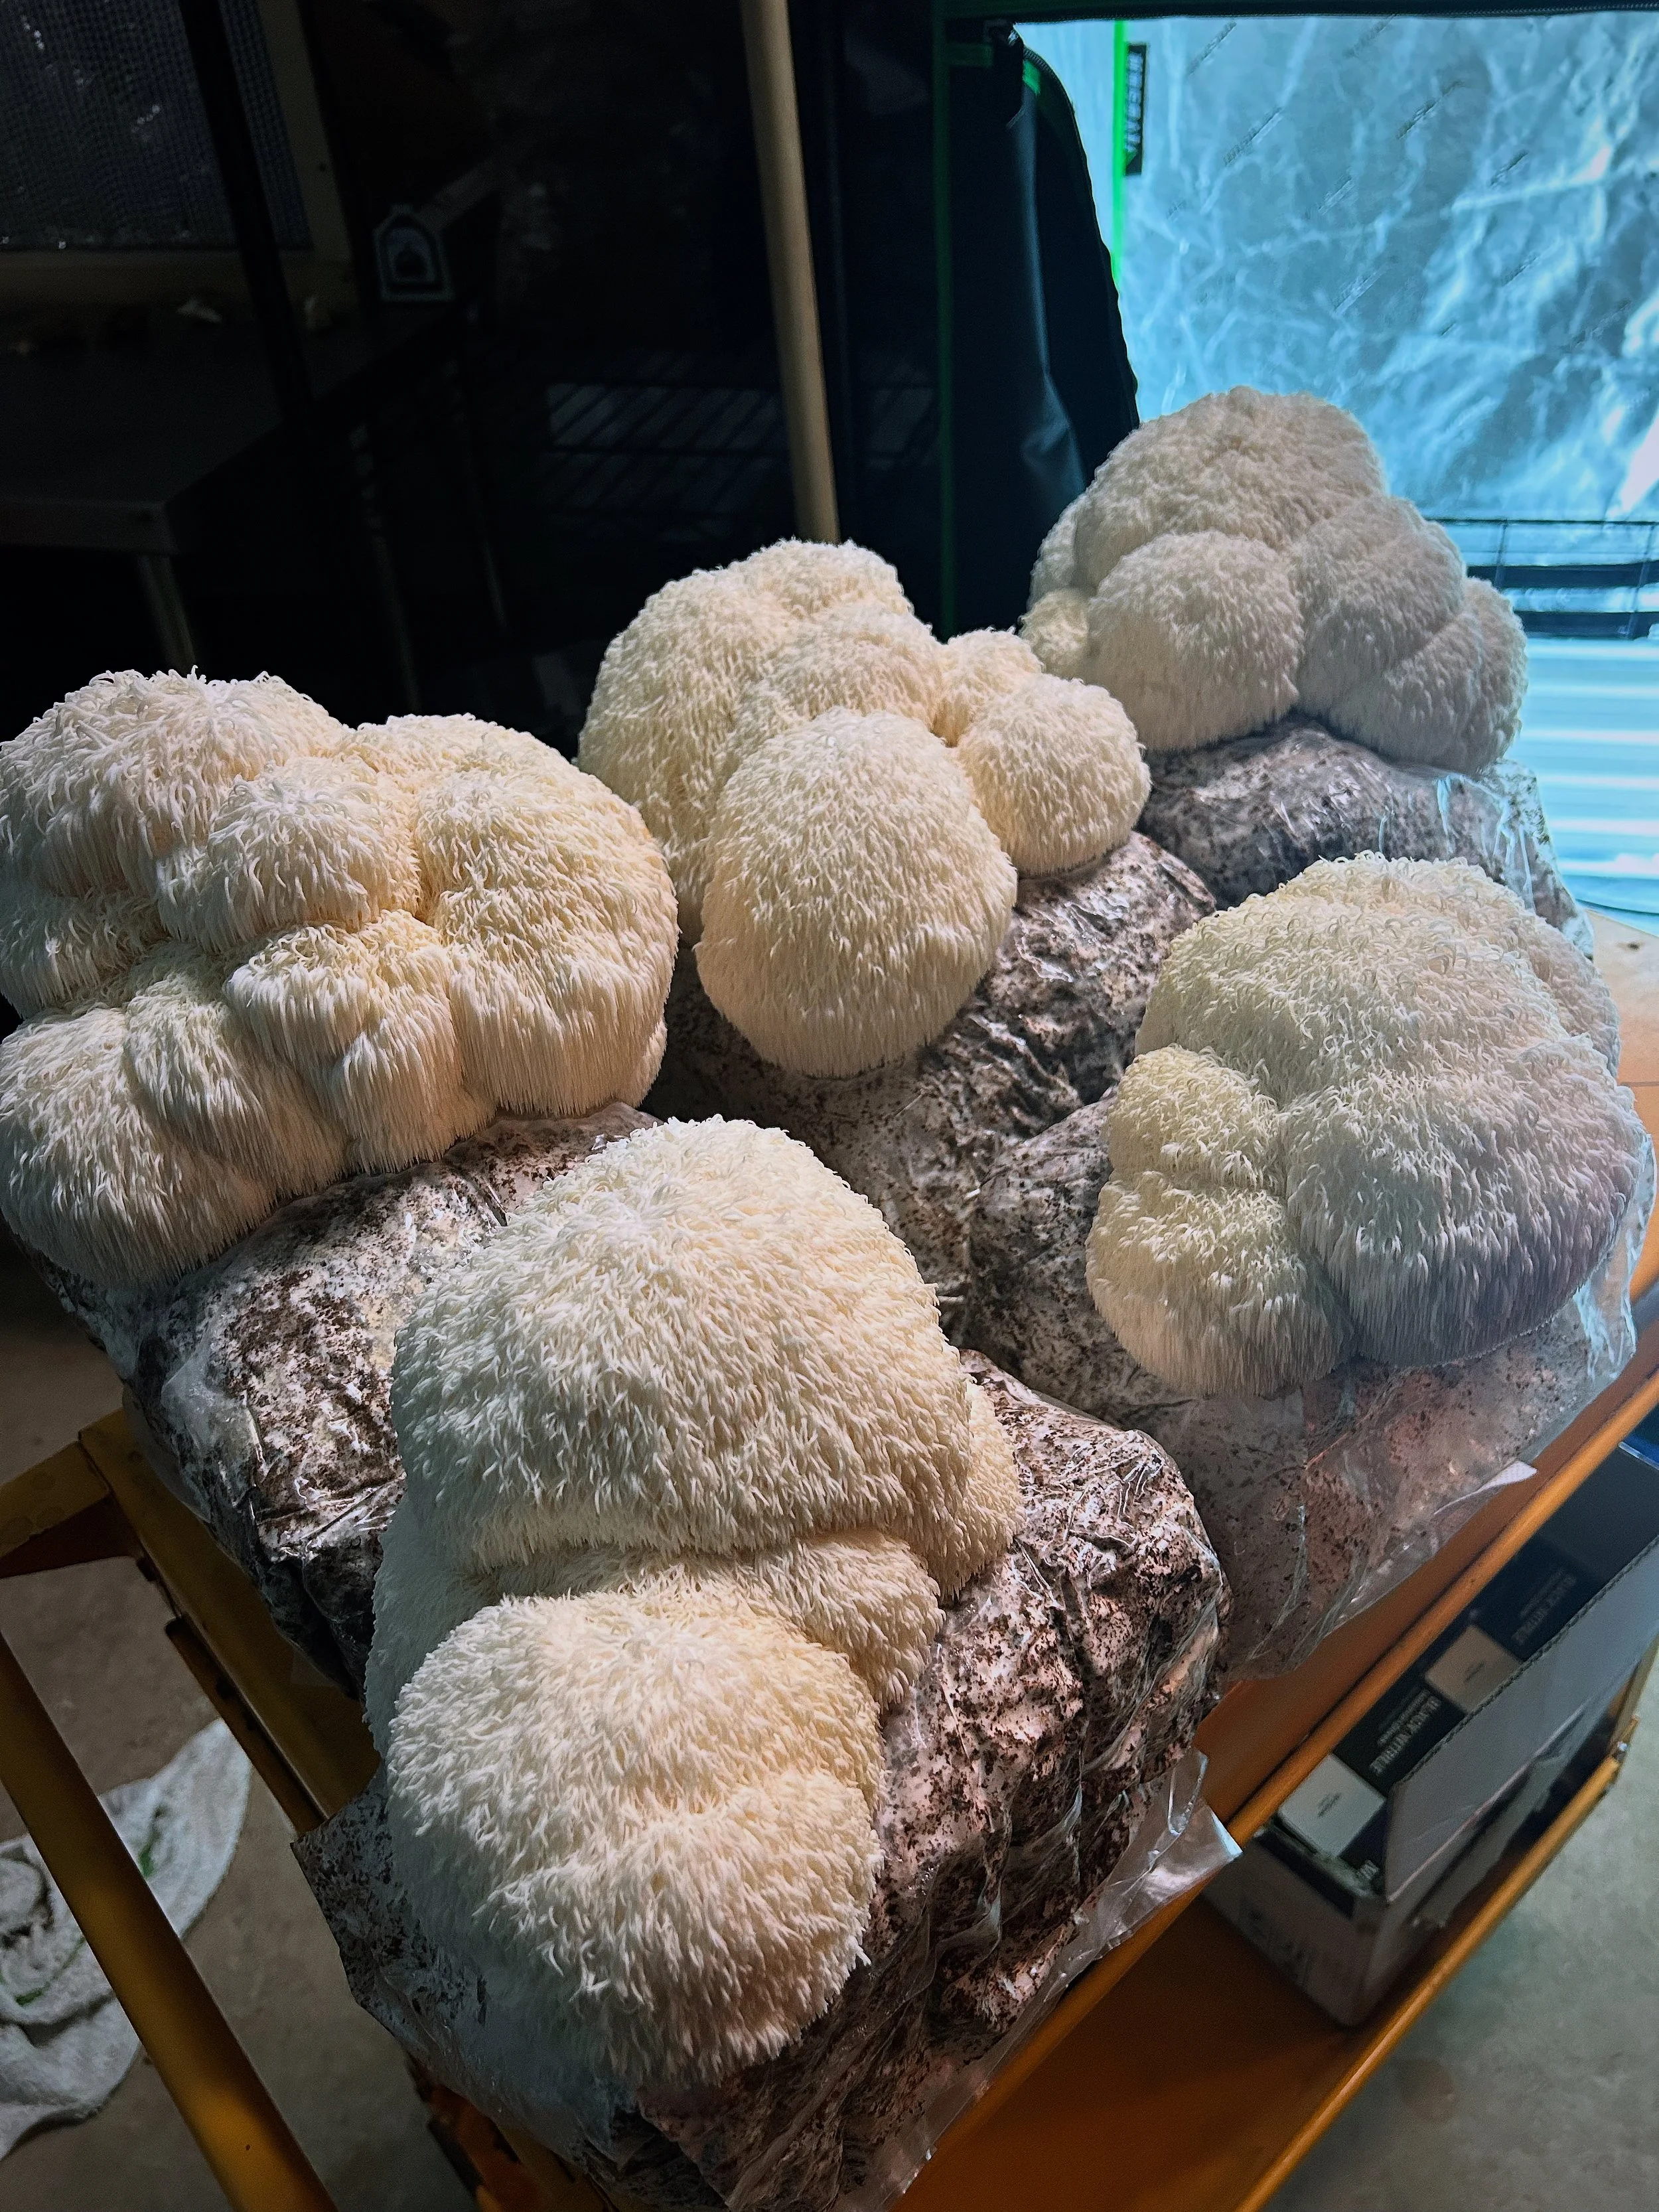
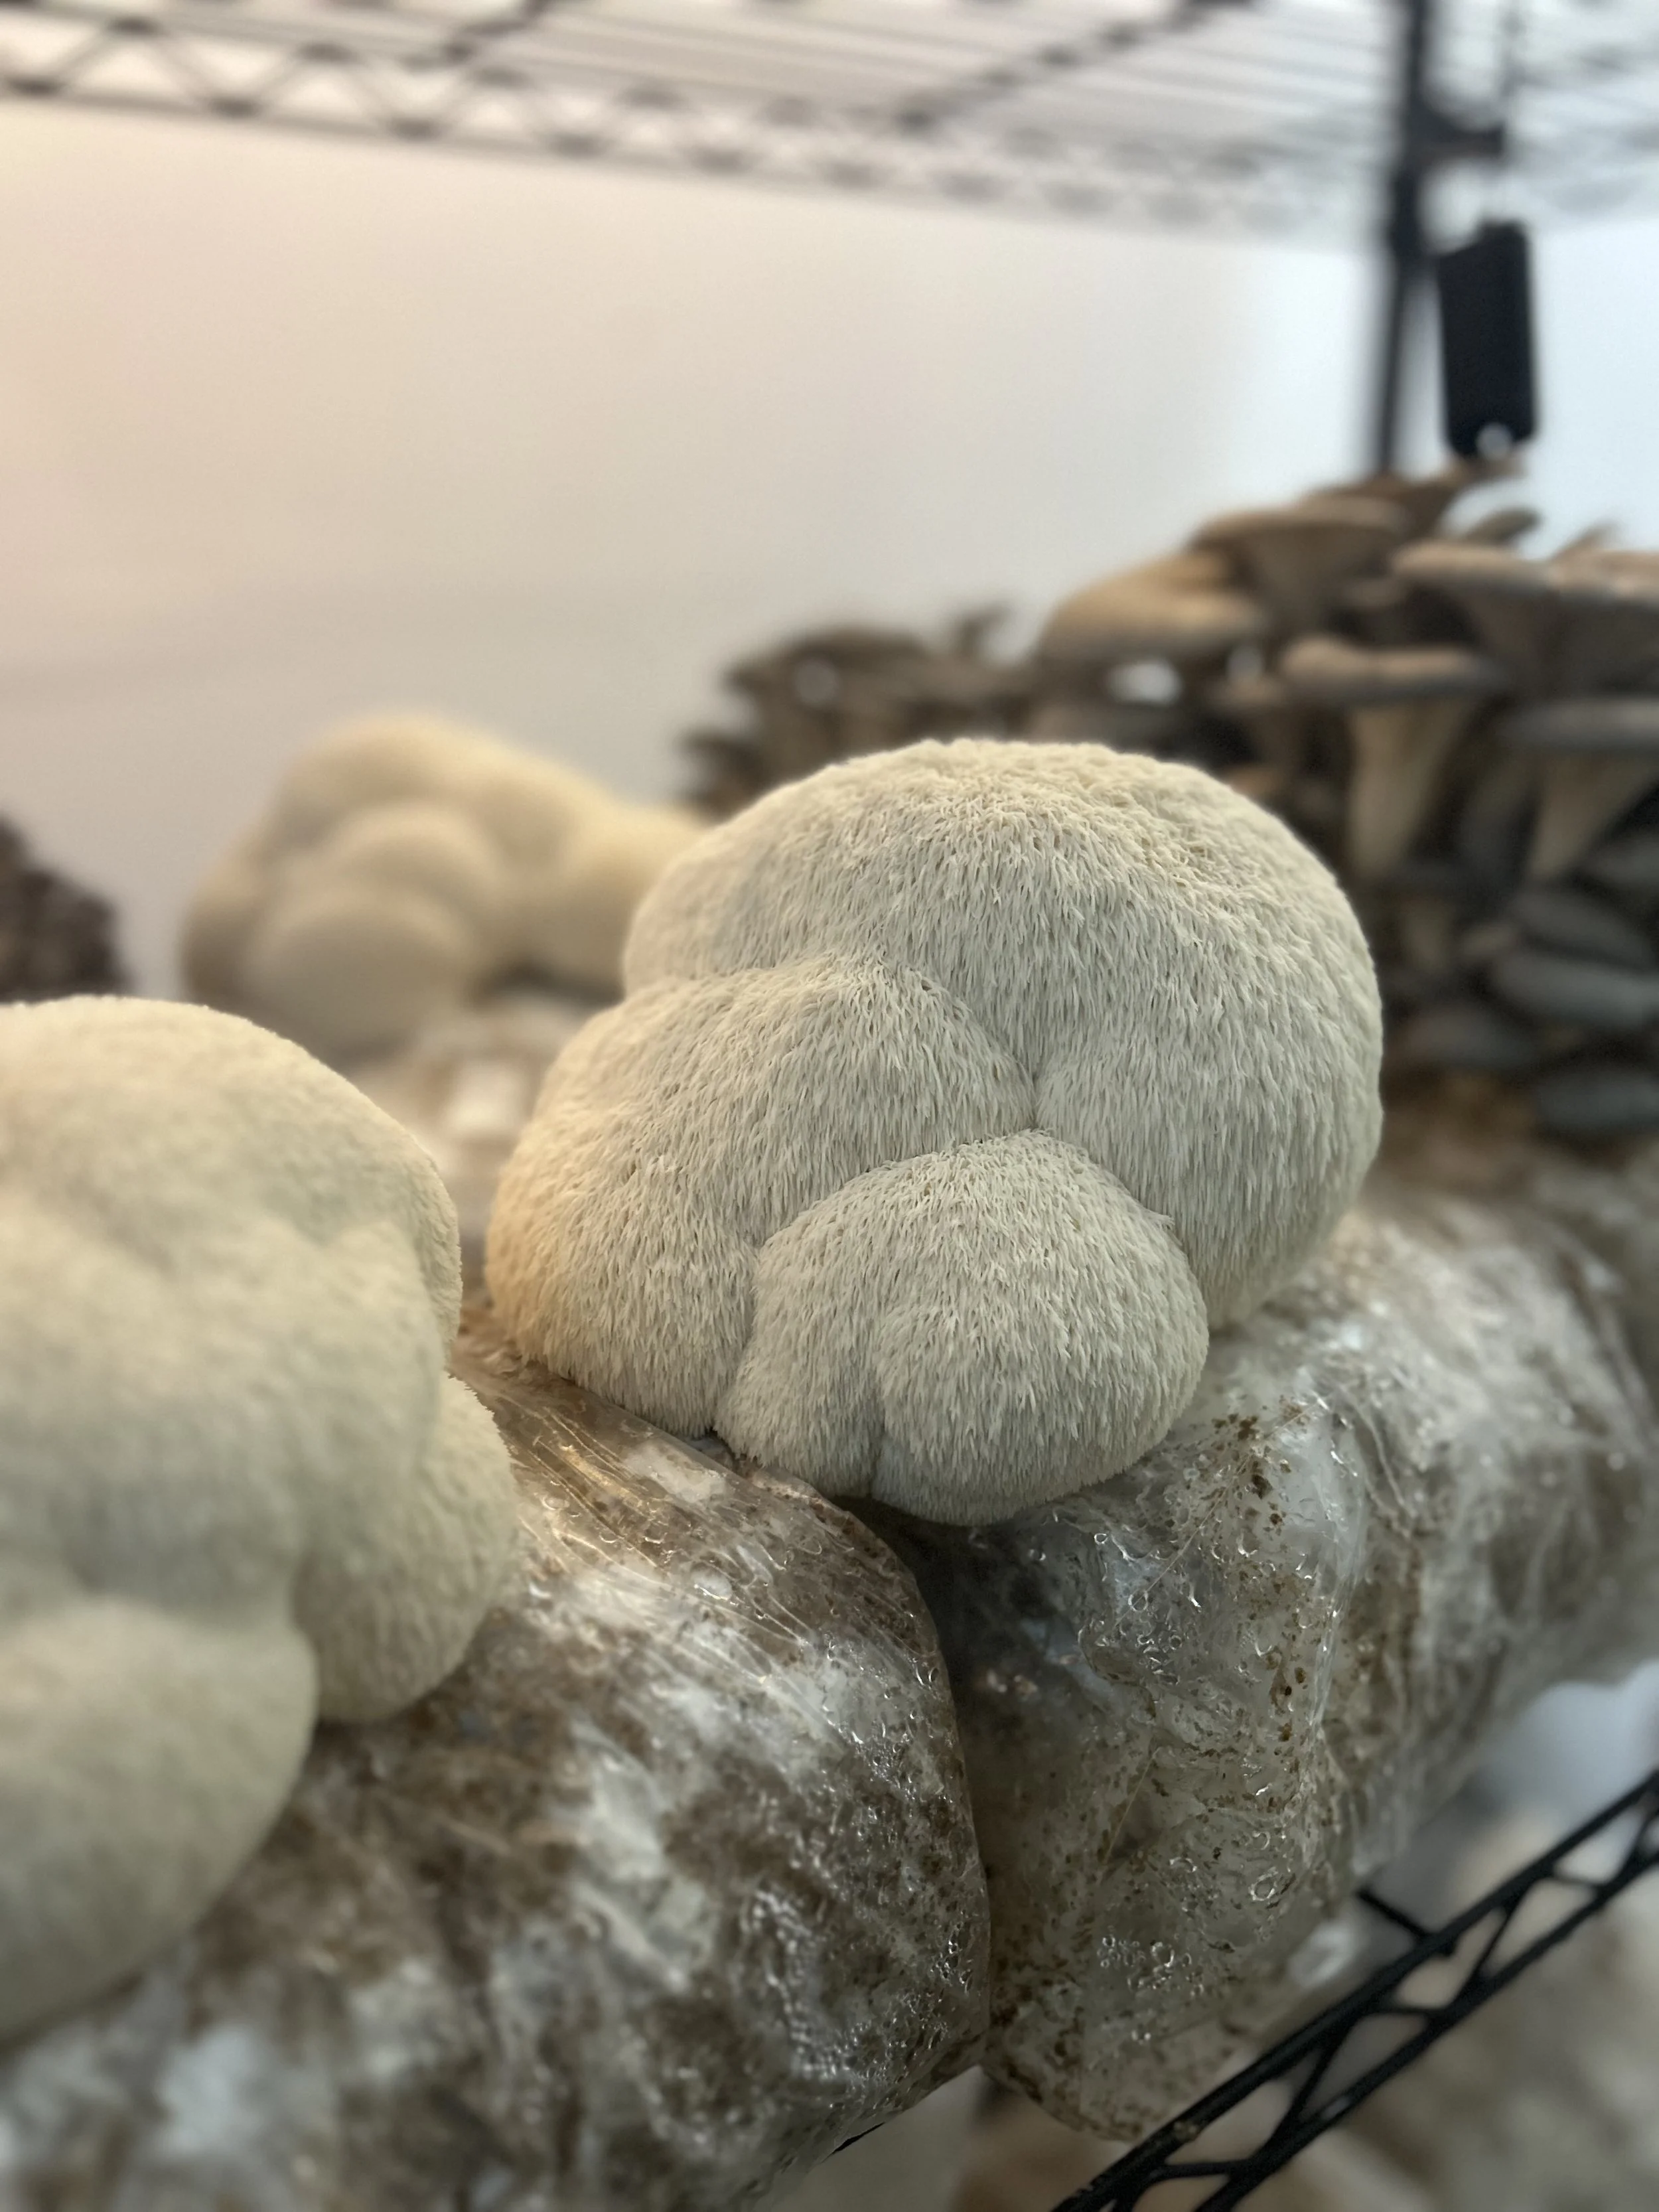
Lions Mane /Coral Tooth and Oyster Instructions:
Fruiting blocks are best grown in a controlled growing environment and perform best with optimal temperature and humidity conditions. An ideal environment for most mushrooms is an area with fresh air, indirect light, temperatures kept below 70 degrees and humidity’s range around 60-90%
Step 1 - select your growing area
Select an area with the most ideal conditions for mushroom growing, such as areas with fresh air, indirect light, temperature below 70 degrees. These environmental factors are crucial for the best results from your block! The ideal growing area will need
◦ Indirect lighting
◦ Temperatures between 55-70 degrees
◦ Humidity kept between 60-90%
◦ Fresh air exchange
◦ clean environment
A shelf or counter is a great place to grow your mushrooms, select a clean area that you can sanitize before placing your block.
Step 2 - initiate fruiting
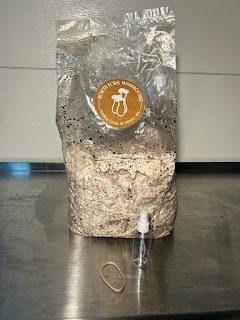
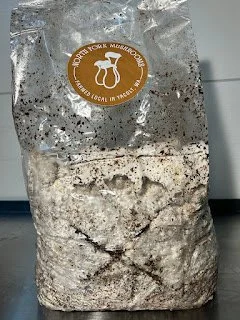
Using a clean tool, make a 6 inch long cut on the plastic bag, your cut will expose the sawdust substrate inside the bag. An X or one single cut, leaving the plastic in place will do. Fold the top of the bag under the block pushing out any air that remains inside the bag, secure with rubber band or alternatively you can fold the top flap under the bag and it will stay in place. Orientate the block so your cut faces up, the top fold flap is under the bag and is well balanced.
Step 3 - maintain conditions
Keep your growing area clean, cool and humid for proper mushroom formation, some things you can do provide the ideal environment for your mushrooms are:
◦increasing humidity
⁃ avoid directly misting the mushroom block, this will leave standing water on the mushroom and will affect growth, and decrease quality and yield
⁃ instead spray surrounding areas or sides of container/humidity dome to increase humidity or add humidifier close by.
- if you are already growing in a humid climate, like the Pacific Northwest for example, noadditionalhumidityneeded.
◦ Providing fresh air exchange
⁃ mushrooms love fresh air. Keeping the block in an open area and not suffocating is best! A room that gets opened a few times a day is sufficient
◦ Maintaining a clean environment
⁃ mushrooms grow best in a clean environment, keep all surfaces clean and wipe down/sanitize as much as you can in your mushroom growing area
Step 4 - harvesting
Your mushrooms are ready to harvest once the caps or mushroom body has reached peak maturity, this usually takes 7-14 days, but can differ depending on environmental factors. You can tell your mushroom is ready by looking for several key indicators. This can differ from species to species.
⁃ Lions mane/coral tooth : doesn’t have a cap so to know it’s mature you wait for the “spikes” on the outside of the mushroom to extend about 1/4-1/2 inch and you may see some yellowing on the spikes.
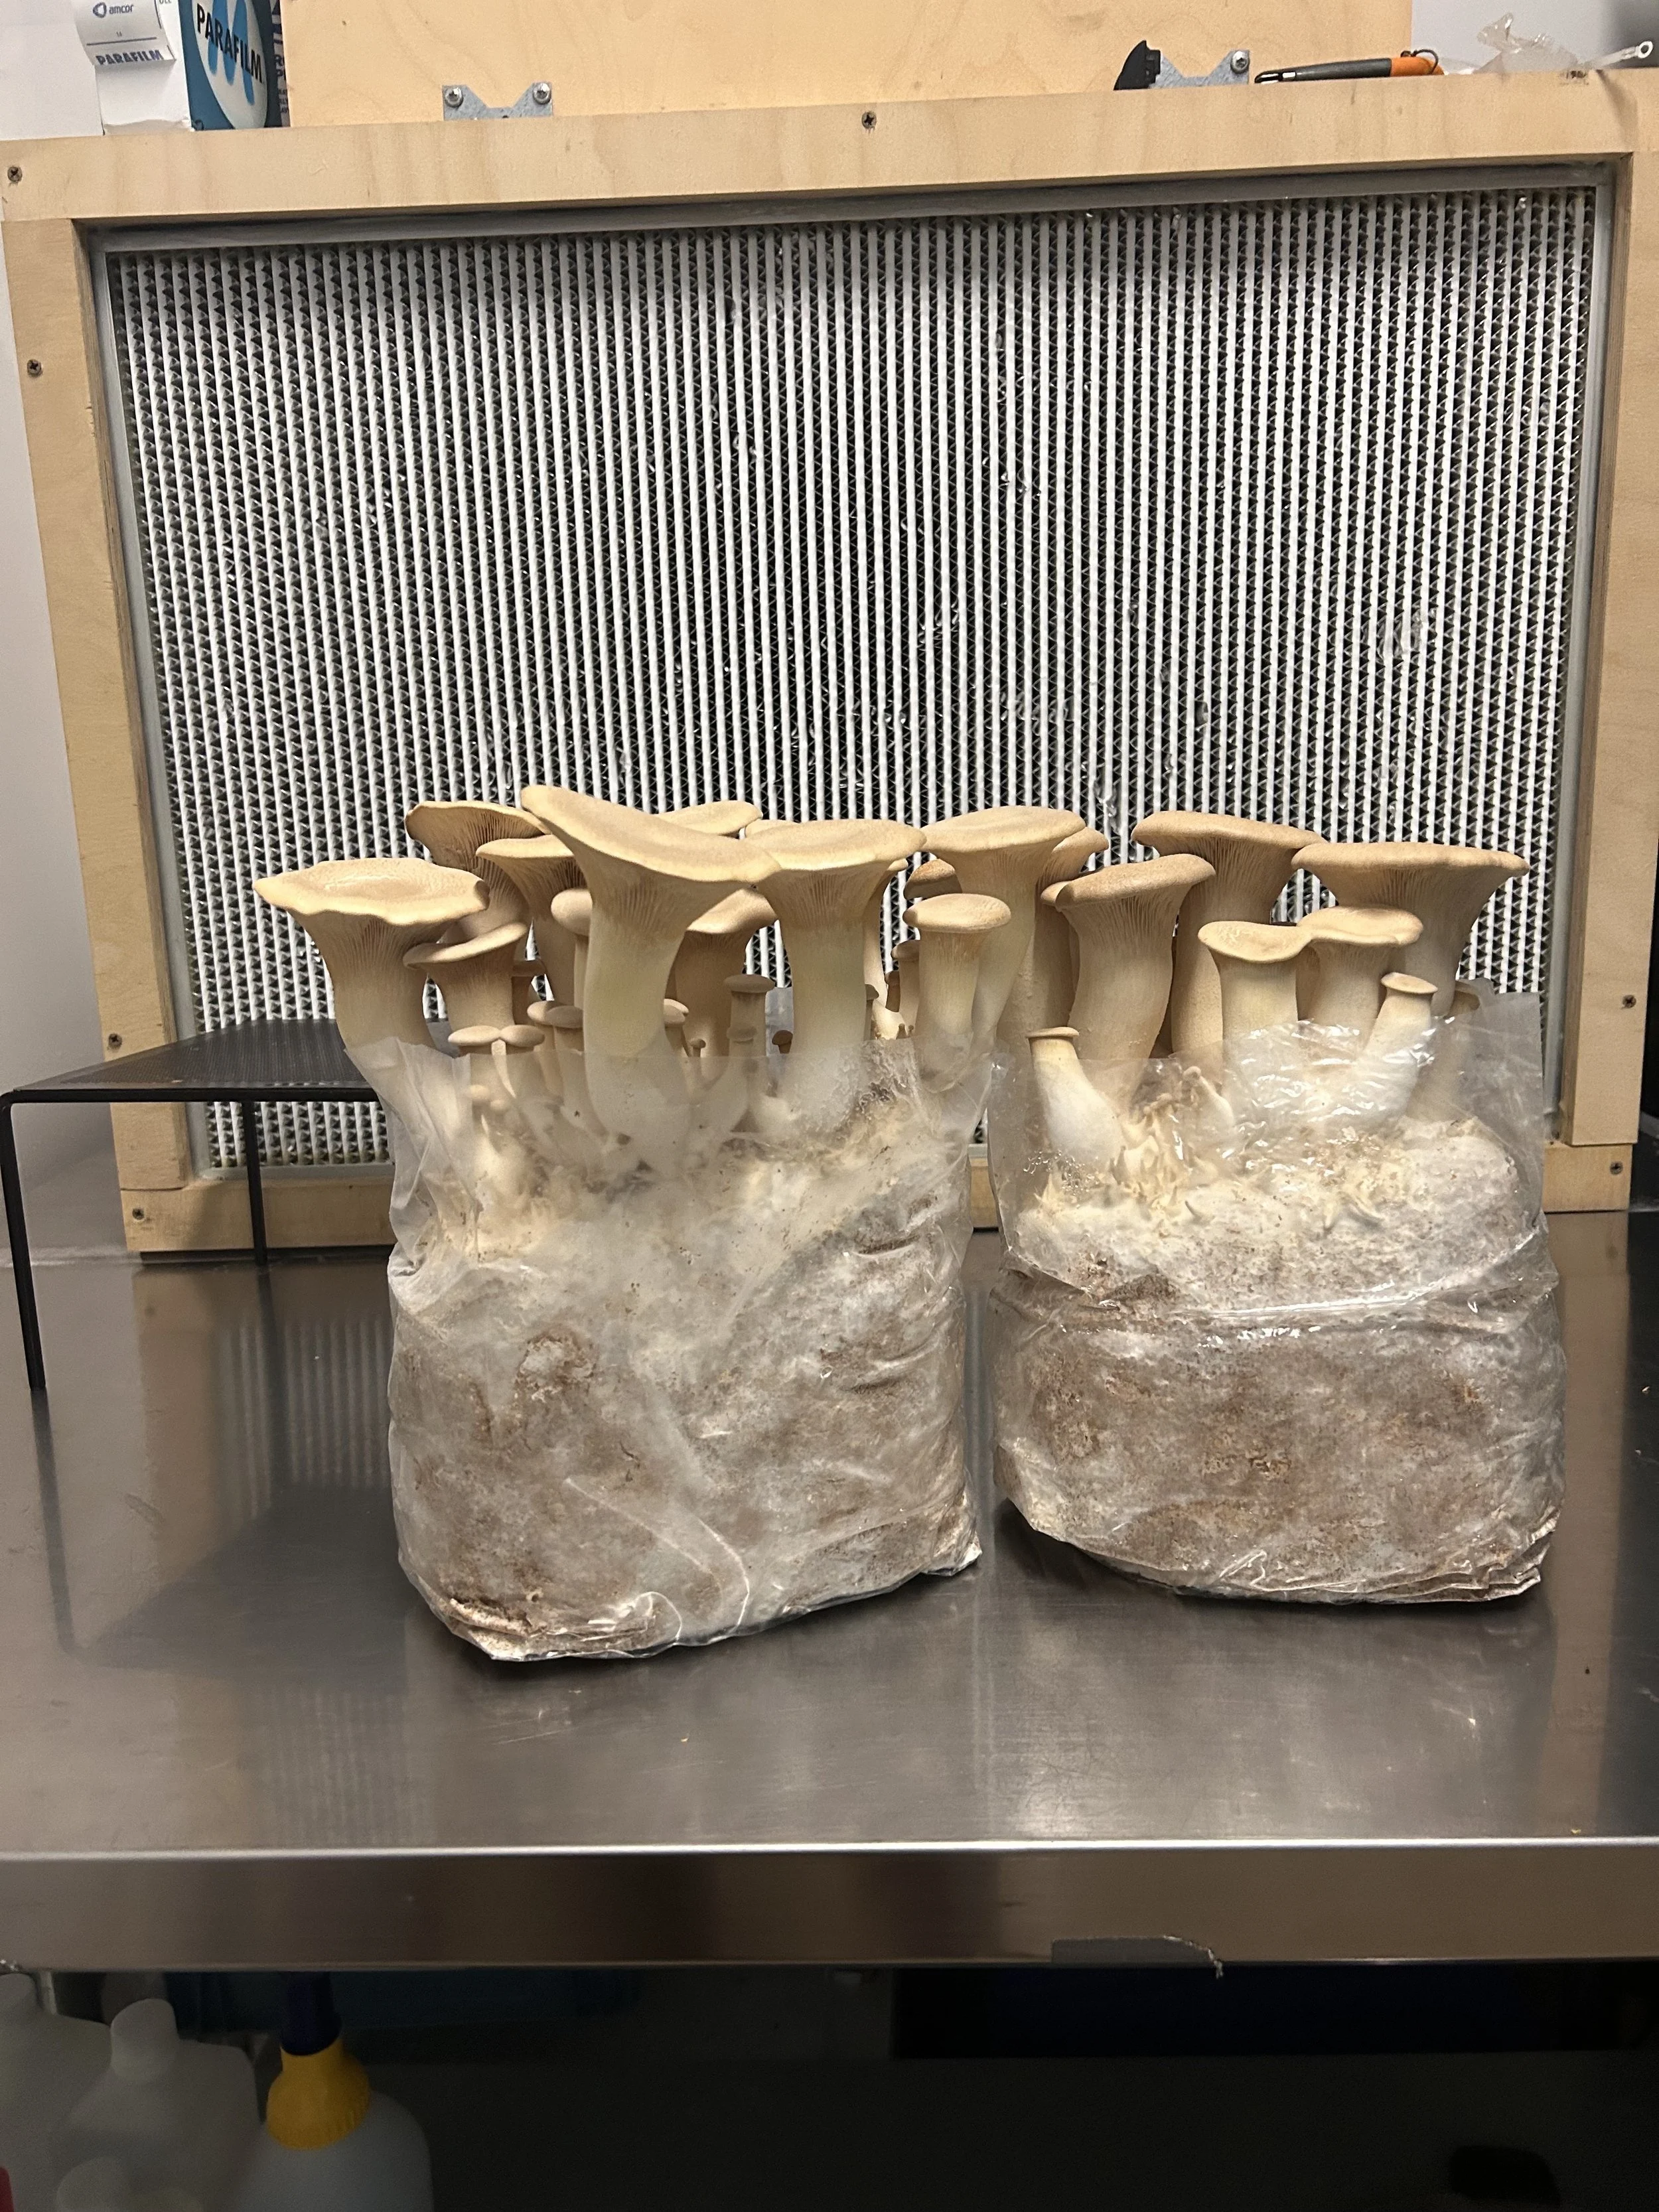
⁃ Oyster mushrooms are best harvested just as the cap is starting to reach out but the mushroom cap edges are still curled under and not pointing up.
When you're ready to harvest your mushroom, use your hand to remove the entire mushroom or mushroom cluster. It is ok to break off some of the sawdust block at the base of the mushroom. Use a clean knife to remove any sawdust from the base of your mushroom. After your mushrooms are cleaned they are best kept in a breathable container and placed in the refrigerator until cooking.
Step 5 - extra flushes
After harvesting your mushroom let your block rest for 1-3 weeks. Maintaining an optimal environment will be the determining factor to help create strong subsequent flushes! Your second and third flush will be smaller than the first. After harvesting your second flush, rest and repeat until growth has stopped or you see contamination (blue/green mold).
Step 6- disposal of fruiting block
When your block has completed its cycle it can be removed from its plastic bag and discarded into your garden or compost pile to break down into nutrients for healthy soil over time! Alternatively, you can place your block outside in a humid area and you may see a bonus flush of mushrooms after some warm spring rains!


King Oyster Fruiting Instructions :
King oyster fruiting blocks are best grown in a controlled growing environment and perform best with optimal temperature and humidity conditions. An ideal fruiting environment for king oyster mushrooms is an area with fresh air, indirect light, temperatures kept below 65 degrees and humidity’s range around 70-80%
King oyster mushrooms can be sensitive so proper care and maintenance are crucial for a robust harvest. King oysters are a top fruiting species meaning that they grow best utilizing the large surface area on top of the block.
Pleasenote! If your block is not 100% white and colonized place in a warm area (70-80 degrees) for 4-5 days or until the mycelium has traveled throughout the rest of your fruiting block before starting the fruiting process!
Step 1 - select your growing area
Select an area with the most ideal conditions for mushroom growing that you have available. These environmental factors are crucial for the best results from your block! The ideal growing area will need :
◦ Indirect lighting
◦ Temperatures between 55-65 degrees
◦ Humidity kept between 50-70%
◦ Fresh air exchange
◦ clean environment
A shelf or counter is a great place to grow your mushrooms, select a clean area that you can sanitize before placing your block.
Step 2 - initiate fruiting
To initiate fruiting make a small incision near the top of the bag, a small hole or cut with scissors is sufficient. After 7-14 days in the proper fruiting conditions your king oyster block will have small mushrooms called pins, forming all over the top surface of the mushroom substrate. The correct time to move to step three is when your mushroom pins inside the bag have reached a size of 1/2-3/4inches.
Step 3 - open your bag
After your pins have reached a mature size it is time to remove the top of the bag. Use clean scissors to cut the bag just below the filter patch. This should leave about 6 inches of the bag remaining above the substrate's surface. This creates a small microclimate with high humidity and low air flow, which the king oyster mushrooms thrive in.
Step 4 - maintain conditions
If temperatures exceed 65 degrees king oyster mushrooms are prone to bacterial contamination (brown streaks on stems) so keep your growing area clean, cool and humid for proper mushroom formation. Some things you can do to provide the ideal environment for your mushrooms are:
◦ Misting the surrounding area of your fruiting kit
⁃ avoid directly spraying mushroom pins
⁃ Spray surrounding areas or sides of container/humidity dome to increase humidity
Step 5 - harvesting
Your mushrooms are ready to harvest once the caps have widened and are almost flat. If left too long the mushrooms will get large wavy caps and drop their spores. It is best to harvest your mushroom before this happens. To harvest your mushroom, gently grab a single mushroom or cluster, with a twist and pull, the mushrooms will break from the block easily. Use clean scissors or a knife to remove any substrate that remains on the base of your mushrooms. It is best to store your mushrooms in the refrigerator, in a breathable container such as a paper bag or similar container that won’t trap moisture is best.
Step 6 - second flush?
Due to how king oyster grows it can be difficult to get a second flush before contamination takes over the block. With proper care and environmental conditions maintained a second flush can be achieved but generally, king oyster blocks are considered finished after the first harvest or “flush” . After you have harvested your mushrooms you can attempt for a second flush or your mushroom block can be discarded into your garden or compost pile and will break down into nutrients for healthy soil over time!
Where should I keep my fruiting block kit?
Choose a humid, temperate area with regular airflow and indirect light, like a kitchen counter. Temperature range of 55 - 70 degrees.
Basements or bathrooms can also be suitable. Control humidity and air-exchange with a humidifier and fan - two key components in growing mushrooms.
Can I grow mushrooms outside with fruiting block kits?
Perhaps the easiest way to grow mushrooms in your garden is by burying fruiting blocks.
Depending on the weather, mushrooms can start growing in just 1–2 weeks, with surprise flushes continuing for months, sometimes even years. This method works well with both fresh fruiting blocks and spent grow kits. You can also use these blocks as compost enhancers or break them up to mix into your soil and mulch. Doing so boosts moisture retention, helps prevent erosion, and returns beneficial mycelium to the earth, enriching your garden naturally.
What should I do with my fruiting block kit when it's done?
Once your mushroom fruiting block has finished growing mushrooms, it can be used in a variety of ways. You can bury it in your garden to stimulate additional mushroom growth, add it to your compost bin for a fungal boost (fruiting blocks make great worm food!), use it as mulch in garden paths or around trees, or break it up and mix it into your garden/potting soil to help boost moisture retention, slow erosion and runoff, and absorb excess water. Simply speaking, returning your mushroom fruiting block to the earth helps boost soil nutrition and your plants will thank you for it.